Monday, November 3, 2008

11/2 update

11/2 update:

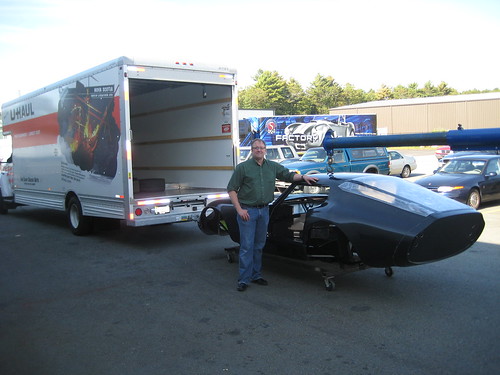
For his bday, CG got the gift of a whole day of working on the car in the garage.

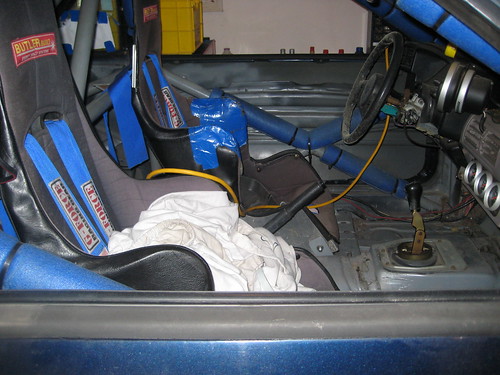
Picking up right where we left off, I tackled pulling apart brake booster and master cylinder. It took a while to unravel this intricate puzzle, but I finally managed. I unbolted the MC's union fittings into the distribution block, so that the brake booster and MC were free. After that, I was able to wiggle them out of the car. With some difficulty, I was able to unbolt the MC from the booster. Unfortunately, I totally destroyed one of the bolts. Need to get a replacement.

The instructions for making manual braking are to fit the brake pushrod directly into the master cylinder piston. Problem is, with the Cobra brake kit, the huge pushrod seems to have a much huger diameter than the piston into the MC. Will need to follow up with FFR to see what's up. Maybe we can buy a pushrod from them.

I sawed the distribution block's brake lines free of the body and recover it as well. The instructions are vague but I think we won't need these lines and will be fitting on parts from the kit.MC and distribution block socked away for now.

Next job for me was starting on the engine wiring harnesses. This was a real pain. Plastics were really brittle, many connectors had their latches on the blind side or hidden, and fasteners were rusted. Still a custom harness from FFR is $475, so this would save a lot of money.


I tackled the driver's side harness first. It seems to have more of the wires powering non-motor devices and distributes the +12v source from the battery mounted in the hatch. Lots of the looms wormed into fender undersides and had to be rooted out.

While I was down there unscrewing the horn and pulling out headlight wires, I found a piece of clag (tire debris) wedged high up into the fender edge. All over the engine bay were chunks and strings of clag. Truly a well worn race car.


All of the left harness was unraveled and labeled. The only thing left attached on the left harness network is 2 plugs into the alternator. I was wearing thin and snapped the latch off of the sensor plug. I think the alternator might have to be loosened or removed to get clearance to pull it off. Any 5.0 guys know?

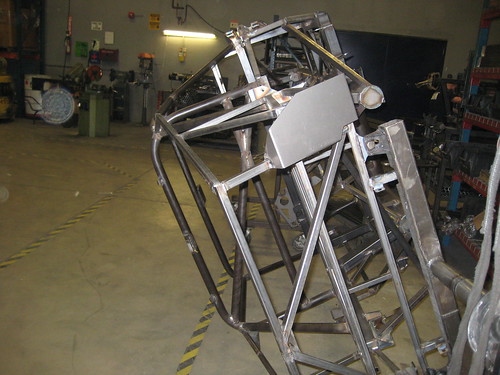
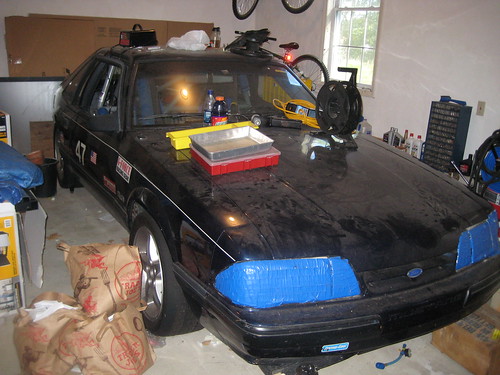
CG and Marc were working on the suspension, panhard setup, and exhaust. It was an ugly ground war against rust and tack welded nuts. They managed to get the sway bar and one rear strut off. Oh, and the X-pipe. Very clean and quite a sculpture after 10 years on the car.

We also got the radiator, fan, and air filter out.


Next:
- loosen rear diff and axle to unload left rear suspension
- plasma cut through some of the quad shock assembly (I dunno what happened back there but I think we ran out of alternatives). Fortunately CG got the upgraded suspension parts so we won't need to reuse that stuff.
- disassemble rest of suspension
- proceed with wiring harness extraction. I need to get all the motor wiring off, and then work from the dash to the back of the car.
- steering rack
- rear diff off
- engine out (maybe with an optional test crank that we keep putting off)


Some wisdoms I gained from doing the wiring harness work. I dunno if it's applicable just to 5.0s or more Fords.
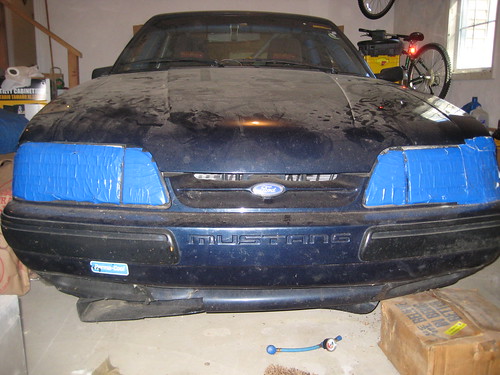
- the lightbulb wiring plugs unlock by twisting counterclockwise, except for the main lights. They have a collar that twists to unlock. Move that out of the way and then there's a latch that comes off with the plug. Once unlocked you can pull them straight out.
- when working with the lights, hands go in through the gaps in front of the radiator bracket.
- remove the light wire looms through the central hole in the radiator bracket that the main wiring loom passes through. All the plugs even with the bulbs on them will be able to snake through. I recommend taping up the bulbs for that extra sense of protection.
- the airbag sensor needs to be pulled out through the same front gap where your hands fit. By god it is a tight fit but it'll work. You might have to unhook the main headlight plug to get clearance. The ABS sensor's loom has a plug further up the harness. To get it out, unplug there and pull that part of the loom through the hole following the sensor's exit.
- the airbag sensor looks like a little transformer mounted under the top of the radiator bracket, but with 2 wires leading to it.
- when disassembling stuff, get into the assembly line frame of mind. Each part should have one clear (if not easy) way of getting installed. If it isn't going to go out one way, keep looking for the correct way. Order matters in that some parts get installed later and can 'lock in' earlier parts.

Monday, October 20, 2008

update 10/19

click on the thumbnails for big.


We finally gave up and drilled out the stuck nut on the strut brace. That might net us $50 from a Foxbody enthusiast. We originally wanted to get it out to be able to oil the cylinders and test if the engine would rotate. But we decided it didn't need to be done now since the test was quick and we'd have plenty of time to rebuild it or source a new engine later.


Ben from Terrafugia disassembling the steering column. It mostly went ok, but the instructions said we could pull the spline shaft free from the steering rack. This wasn't the case for us, so we undid the next U-joint towards the steering rack and pull everything up to that half of the U-joint through the firewall. Note for the FFR manual: there could be a lot of loose single wires that the steering column mounts could snag on, so make sure you have clearance before you try to tug it out. We still have to remove the sleeve around the steel column shaft, as the kit doesn't need it. Oh, and the U-joint half needs to go with the steering rack, not here. Just to stick to the instructions.


Steering wheel and column out of the car. Note CG's aftermarket tach and shift light. His speedo cable broke, so we'll have to buy one as a donor part for the kit.


The ECU. This was hell to get out because it was packed between the rollcage and the fender wall. It was a slow process of unsnapping plugs and unbolting the ground. This thing better still be working, dammit.


Shot of the opened up Mustang. When we first tried to do either the ECU or steering column, we found the tight bucket seats to be a huge pain to work around, so we unbolted those and took the doors off. Oh, and also removed those roll cage foam pads, since the zip ties ends kept stabbing us as we got in and out.


The Mustang is nice and boxy, so perfect to storing stuff on.


the racing seats with their covers removed. Not sure what the plan with these is. The kit came with some seats and harnesses of their own.


Steering column and brake pedal washers. We were halfway done with removing the brake booster and master cylinder and decided to call it a day. But we at least unhooked the brake pedal from the brake booster pushrod. The instructions emphasized remembering the order of washers and clips mating the pushrod to the pin on the brake pedal, so I drew a diagram and ziptied them in order.


Misc crap sitting on the intake manifold.

It was a good 3 hour session. We were pretty on target time budget-wise with the donor part removal steps, but didn't account for taking out the seats and doors.

Next steps, roughly in order:
- bleed out brake fluid before removing MC and brake booster (I don't think the instructions reminded us to do it)
- remove brakes
- remove brake booster and MC
- remove steering rack
- extract wiring harness (will be a royal pain in the ass)
- rear end, suspension elements, e-brake
- headers, engine and tranny

Tuesday, October 14, 2008

Delivery Day

On Tuesday 14-October we took delivery of the Factory Five kit. This was a really fun day, as I traveled to the Factory Five factory in Wareham, MA with a UHaul to pick up the kit.

The Factory Five World HQ is located in a somewhat non-descript facility at the end of the road in an industrial park. I was pretty sure I had arrived when I hit the cul-de-sac and the pavement was full of skid marks. This transporter pretty much gave it away too:


The showroom has really stunning examples of the various models sold by Factory Five. I was particularly excited to see the Type 65 Coupe close up. I’ve seen one running example of this car on the street (for about a minute as the guy motored away), and I’ve seen the Factory Five DVD. But it wasn’t until Tuesday that I actually put hands-on the car itself:


There was also an excellent example of the GTM Supercar. I’m very interested in building one of these some day. We’ll have to see how the Coupe build goes first, but the GTM is an amazing car.


I met with Jason Lavigne, who gave me a tour of the facility. It’s a very cool place – a combination of straightforward and sophisticated, industrial and high tech. Everybody there is fired up about cars and racing and downright friendly. Judging from all the build blogs out there Factory Five must be one of the most photographed factories in the country. Nobody seemed to mind as I snapped pictures during the tour.

Stack of main tubes for coupes:


Vehicle chassis on rotating frame:


Roadster bodies stacked up:


Aluminum panels ready for use. These are pre-shaped, with cut-outs, and ready to go:


Coupe dashboard panels:


Coupe doors under construction:


After touring the facility and meeting people at Factory Five it was finally time to meet the kit. It sounds corny, but seeing this sign attached to the body of my kit was really exciting:


Next it was time to load the kit into the truck. Here’s the stack of boxes on board:


Here is kit, on a rolling frame, ready to go on the truck:


When you pick up the kit the body is on the frame, and several of the aluminum panels are on the frame. The windshield and rear glass are taped onto the body. In order to load the car the guys removed the windscreen and rear glass, and then guided a boom into the cockpit. This allowed them to raise up the car by the roll hoop and put it in the truck.


Once I got the kit loaded, I headed back to the showroom to take some technical photos of the front suspension. As I looked around, Dave Smith (President and founder of Factory Five) wandered over and introduced himself. This led to a great discussion of chassis setup, car philosophy, etc. He showed me the Roush Coupe, which can be seen on the Factory Five web site photo gallery. Dave is a committed racer and passionate about cars, and really seems to enjoy his job. Meeting him was totally by chance and was pretty neat.

With the truck loaded up I stopped a nearby Lowes and bought some tie down straps to secure the chassis for the ride home. Then I headed for home to unload.

Meng and Marc came over to help unload the car. The photos we took of the off-loading process did not come out, which is unfortunate. Sufficient to say, however, you really want 4 (or maybe even 6) people to help out with the unloading process. The 3 of us struggled a bit, but ultimately we got the body off the chassis, the chassis into the garage and on stands, the boxes into the garage, and the body propped up on wood outside in the driveway.

Friday, October 3, 2008

Craftsman Tools

I mentioned in an earlier post that I had picked up some more tools for this build.  I used some gift cards and bought a Sears Craftsman 260 piece mechanics tool set.  It came with a "free" 3 drawer plastic tool box that I originally thought would be useless.  Instead I was pleasantly surprised.  Each of the 3 drawers is fully removable from the box, and holds the sockets and drivers for 1/4", 3/8", and 1/2" sized ratchets respectively.   The size of each socket is molded into the drawer which makes finding the right size easy.  Best of all, you can carry the drawer to the work site easily, which makes locating the right size socket while in an inconvenient location (like under the car) much simpler.

I've always been a fan of Sears tools, and this set continues to keep me a fan.  Now I just need a couple cabinets and a few more air tools and the shop will be well equipped.

Fun tearing down...

The team is starting to come together now as the delivery date for the kit draws near.  Meng and Marc came out tonight to look over the car and assess things. We've decided to continue with tear-down, and eventually focus on getting the engine to turn over.  Assuming it's a bad starter or other external gremlin, if we can get the motor to spin freely then any issues can probably be fixed while the engine is out of the car and on the stand.  

So we dug into the tear-down.  The car is up on stands and the hood has been removed, the chassis brace is all but off (and would be completely off if not for a stripped bolt - I need to run to Sears for a nut-breaking tool).  The biggest accomplishment of the evening was getting the fuel cell out of the car.  The car has a FuelSafe cell which fit in the existing mounting points (using customized straps provided by FuelSafe) and uses the existing filler neck.  The cell is heavy - probably 10-12 gallons of old gasoline in it.  We supported it with floor jacks, removed the straps, removed the filler, and carefully lowered the cell to the floor.  The cell is now outside the garage waiting to be drained.

With the fuel cell out of the car we can now turn our attention to removing the Panhard bar, which in turn will give us access to the rear end, which we need for new car.  Once the Panhard bar is out of the car we can also get access to the exhaust system, all of which needs to be removed.

All the various nuts, bolts, and pieces that have been removed are boxed or bagged, ready to go onto the new car or be sold for another project.  We'll have several good pieces to sell soon:  Panhard bar, chassis brace, heavy duty caster/camber plates, etc.

It felt really good to pick up some tools and do some work.  Even though it's just tear-down, which by nature is a dirty, messy process it was still fun.   

Wednesday, September 24, 2008

getting ready...

So I am sweating about the old Mustang's engine not being able to start.  My friend Anthony filled my head with dire prognostications about seized up motors, bad piston rings, etc.  I really hope it's something innocuous like a bad starter.  Nevertheless, tonight I will pull spark plugs, have a look around, and put in some Mystery Oil to get the engine at least a little prelubricated in preparation for being started.

We plan to work this Thursday.   If things go our way we'll remove and drain the fuel cell (and fuel system),  and hopefully get the starter pulled out for testing.  

In the meantime garage/shop preparation continues.  I stopped by Sears today and used a couple of gift cards (that I got from work last year) to pick up another set of tools, basically for free.  IMHO, tool shopping at Sears should be regulated like controlled substances - it's totally addictive.

Sunday, September 21, 2008

a sweet cornucopia of 5.0 motor reference material

http://www.veryuseful.com/mustang/tech/engine/

the old Mustang doesn't start

there's decent evidence it's just a bad starter, but we'll have to thoroughly inspect things to figure out what's up. Hopefully next time we'll be able to take off the starter and see if it runs on its own, and if there's any problems at the flywheel.

Saturday, September 20, 2008

the donor car - preparing to dismantle

The donor car is my 1990-body 5-liter Ford Mustang.  I've had this car for a number of years and am fairly happy with how it turned out.  I'll post a more complete write-up about this car later.


Here are some pictures of the donor car - looking a bit sad after almost 3 years sitting in the garage. The observant reader will note that CG has a significant amount of cleaning to do in the garage before the build gets underway in earnest.

The above shows the the donor car where it sat in October 2005.  I had just finished the driving season with a multi-day event at NHIS with the BMW Club.  It was always the plan to get the car out for the next season, but I got busy with the rest of my life and never had a chance to get behind the wheel.  


Front view of the car.  The headlights are taped over to avoid dropping glass and sharp pieces on the track if I ever hit anything (and I did once - look carefully at the driver's side and you might notice that part of the headlight cover is missing).  Also note that air intake at the bottom of the car, and 2 ducts  located just below the bumper - those push cool air to the brakes.  If you've ever driven a 3,000 pound racecar you know how hot brakes can get.


Above is a view from outside the passenger window.  You can see the aluminum race seats and 6 point harnesses.  Note that the interior has been largely removed, and the doors gutted out.  You can also see that gauges are installed where the heater controls used to be.  A large tachometer with shift light is above the gagues.  You can also see some of the roll cage and get a sense of how the safety systems were put together.


Here's a view of the driver's seat.  Note the highly sophisticated and uber-chic tape job over the fabric.  Basically the fabric wore through here.  New seat covers turned out to be seriously expensive, hence the hack job with the racer tape.  You can also see a little more of the roll cage, and yes those are lawn chair in the back seat.

what we're building...

Order information for the Type 65:
  • Coupe Base Kit
  • Powder coat chassis
  • Body cut-outs @ factory
  • Tubular front lower control arms
  • 3-Link rear suspension
  • 302 headers
  • Ultra Lite electric gauges
  • Competition aluminum seats
  • 14" leather-wrapped steering wheel
  • Upgraded Koni coil-overs
The 3-link rear suspension:
  • Modified frame
  • Axle mounts
  • Panhard bar
  • Rear coil-over shock absorber kit
  • Control arms
The 3-link rear is what is specified for the Factory Five Challenge Car.

The Type 65 coupe tips the scales at around 2,200 pounds.  This is a full 1,100 pounds lighter than the donor racecar, and will have substantially better suspension and handling.

Friday, September 19, 2008

the rough schedule

With steady work contributions starting this week, we should be done with the build toward the end of the year. FFR estimates 300 man-hours on the build. And we're going to conservatively estimate it at 400 hours. Often with more than 1 person working at once. As for all the work of painting it (which is not part of the build), we'll decide how nicely we want the paint job to come out when we get there. Tired and beat == 30-foot paint job. Still excited == 10-foot paint job. CG has decided on a British Racing Green shade for the car. And not to stripe it, at least not initially.

So tentatively, we'll shoot for 12/25 (or, you know, before people take vacation) as the day when we drop off the car for paint and clear-coat. It's still possible that we'll attempt to paint it ourselves.

Perhaps the biggest unknown right now is a mod that CG really wants -- an in-cockpit adjustable brake proportioning valve. Based on the location of the master cylinder, it shouldn't be impossible to set up, but there would be no help or references. At least not for on a Type 65 Coupe.

team meet on 9/19

So everyone got together at Phoenix Landing to meet each other. Previously it was all friend-of-a-friend email exchanges, but finally we all got to chill face to face.

It was really cool learning what the Terrafugia guys do at work, and it sounds like a natural fun project for them to be working on the car. They have much needed experience with body prep work, welding, and hard brake line work.

We're gonna get started on firing up the engine and hopefully beginning teardown on the Mustang (which I'll leave CG to describe in detail).

Thursday, September 18, 2008

Some info on the Type 65 Coupe

Factory Five's page on their replica kit.

And the wikipedia page on the original.
I guess it's got a nice slice of history that Dan Gurney and Bob Bondurant took it to a GT class win in the 1964 Le Mans.

Jay Leno driving the infamous long lost 6th coupe.

Factory Five pickup date...

We've been given a date of 2008-10-11 to pickup the Factory Five Type 65 Daytona Coupe kit from the factory.  The plan is to rent a y'all haul, take delivery at the factory in Wareham, and then hopefully have an unloading party at the garage.